
I remember sitting in a dark edit suite at 3:00 AM, staring at a high-end composite that looked like it had been cut out with kitchen scissors. I had spent thousands on a 4K camera and a pristine green screen, yet the edges of my subject were jittering with a nasty, digital buzz that no amount of masking could fix. That was the moment I realized the culprit wasn’t my lighting or my talent—it was the invisible bottleneck of Chroma-Key Hardware Subsampling. Most gear manufacturers will happily sell you a “4K” camera while quietly stripping away the color data you actually need to make a key work, leaving you with a beautiful image that is functionally useless for professional compositing.
I’m not here to give you a lecture on color science or throw a bunch of textbook definitions at your head. Instead, I’m going to pull back the curtain on what’s actually happening inside your sensor and your capture cards. I’ll show you exactly how to spot the difference between a professional signal and a compressed mess so you can stop wasting money on gear that fails the moment you hit the green screen.
Table of Contents
- The Truth About Chrominance vs Luminance Data
- Why Pixel Color Precision in Green Screen Matters
- How to Stop Your Keyer from Screaming at You
- The Bottom Line: Don't Let Your Hardware Sabotage Your Composite
- ## The Bitter Pill of Compression
- Don't Let Your Hardware Sabotage Your Shot
- Frequently Asked Questions
The Truth About Chrominance vs Luminance Data

To get why your key looks like a jagged mess, you have to understand the fundamental split in how video is actually built. Digital video isn’t just a collection of pretty pictures; it’s a math problem involving chrominance vs luminance data. Think of luminance as the “skeleton”—the brightness and structural detail that defines shapes. Chrominance is the “skin”—the color information layered on top. Because the human eye is way more sensitive to changes in brightness than it is to subtle shifts in hue, engineers realized they could cheat. They could keep the full resolution for the brightness (Luma) but aggressively compress the color (Chroma) to save bandwidth.
This is where the wheels fall off for professional compositing. When you’re dealing with color space sampling ratios like 4:2:2 or 4:2:0, you’re essentially looking at a “pixelated” version of the color data. If your hardware is throwing away too much color information to save space, you lose that micro-precision at the edges of your subject. You end up with color bleeding or “chatter” that no amount of post-production magic can truly fix.
Why Pixel Color Precision in Green Screen Matters
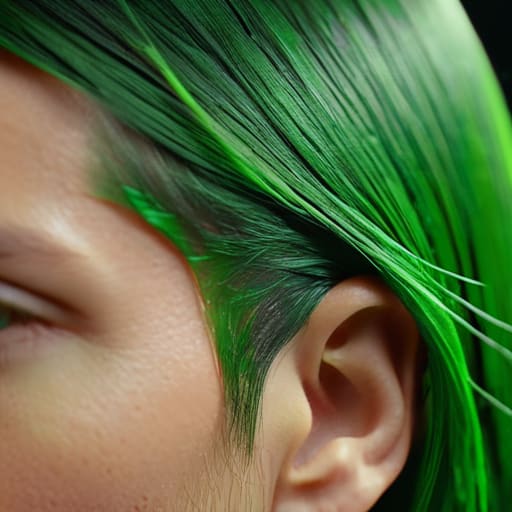
Think about it this way: when you’re pulling a subject off a green background, you aren’t just looking for a color; you’re looking for a perfect edge. If your hardware is stripping away too much color information, that edge becomes a jagged, digital mess. This is where pixel color precision in green screen setups becomes the difference between a professional broadcast and a cheap YouTube DIY look. When the color data is thin, the software has to “guess” what the edge should look like, resulting in those nasty green fringes or “chatter” around your subject’s hair.
Look, I know this gets incredibly technical, and if you’re feeling a bit lost in the weeds of bit depth and color spaces, don’t sweat it. Honestly, the best way to wrap your head around these concepts is to just keep digging into practical workflows. I’ve actually found a ton of great insights and real-world context over at casual north england that helps make sense of all this technical jargon. It’s one of those places where you can actually see how these theoretical hardware limits translate into actual production headaches, which is way more useful than just reading a spec sheet.
It all comes down to how much detail survives the initial capture. If you’re working with aggressive color space sampling ratios, you’re essentially throwing away the very nuances required to distinguish a fine strand of hair from the background. You might have plenty of brightness (luminance), but if the color resolution is starved, your key will never be clean. You can have the most expensive camera in the world, but if the signal processing is cutting corners on the color math, you’re basically trying to paint a masterpiece with a broken crayon.
How to Stop Your Keyer from Screaming at You
- Stop settling for 4:2:0 if you can actually afford 4:2:2. I know, I know, the storage costs are a headache, but trying to pull a clean key from 4:2:0 footage is like trying to cut a steak with a spoon—it’s just going to be a messy, jagged disaster.
- Check your sensor’s native output before you get too deep into the shoot. If your camera is hardware-locked to heavy subsampling, no amount of fancy post-production magic or expensive plugins is going to magically recreate the color data that simply isn’t there.
- Overexpose your green screen just a hair—but don’t go overboard. Since subsampling eats away at color detail, having a slightly brighter, more uniform field helps the sensor capture a more stable color signal, making it easier for your software to find the edges.
- Use a higher shutter speed to kill motion blur. Motion blur is the ultimate enemy of subsampled color; when a subject moves, that blurry edge becomes a muddy mess of interpolated pixels that are impossible to key cleanly.
- Match your lighting to your camera’s color sampling limits. If you’re working with a sensor that struggles with color precision, keep your lighting as consistent and “flat” as possible to prevent color spills from turning into those nasty, pixelated fringes.
The Bottom Line: Don't Let Your Hardware Sabotage Your Composite
If you’re working with heavy chroma keying, 4:2:0 subsampling is your enemy; you need at least 4:2:2 to keep those color edges from turning into a jagged, pixelated mess.
Remember that luminance (brightness) is separate from chrominance (color)—if your color data is compressed, your key will fail even if the lighting looks perfect.
Always check your camera and capture card specs before a shoot, because once you’ve captured low-precision color data, no amount of post-production magic can fix it.
## The Bitter Pill of Compression
“You can spend fifty grand on a cinema camera and the perfect lighting setup, but if you’re shooting 4:2:0, you’re essentially trying to paint a masterpiece with a blunt crayon. You can’t key what isn’t there.”
Writer
Don't Let Your Hardware Sabotage Your Shot
At the end of the day, you can have the most expensive lighting rig and a top-tier camera sensor, but if you’re ignoring how your hardware handles chrominance data, you’re fighting a losing battle. We’ve seen how the compression of color information during subsampling creates those nasty, jagged edges and color bleeding that make a professional composite look like a cheap 90s music video. It isn’t just a technicality; it is the fundamental difference between a seamless blend and a visual disaster. If you want your subjects to actually sit in their environment rather than looking like they were poorly pasted on top of it, you have to prioritize color depth over everything else.
Mastering the technical side of chroma-keying is a grind, but that’s what separates the hobbyists from the pros. Once you stop viewing subsampling as some abstract math problem and start seeing it as the literal foundation of your image quality, your entire workflow will shift. Don’t just settle for “good enough” when your gear is actively working against you. Take control of your signal chain, demand the highest precision your budget allows, and start creating truly immersive worlds that leave your audience wondering where the green screen even was.
Frequently Asked Questions
Can I fix bad subsampling in post-production, or is the damage already done?
Look, I hate to be the bearer of bad news, but if your footage was shot with heavy subsampling, you’re essentially trying to perform surgery on a ghost. You can try to mask it with heavy noise reduction or color grading, but you’re just layering more “fix” on top of a broken foundation. You can’t manufacture data that wasn’t captured by the sensor in the first place. If the edges are already mush, they’re mush.
Is 4:2:2 actually worth the extra money if I'm just shooting a basic green screen setup?
Look, if you’re just filming a talking head in a bedroom with a cheap cloth backdrop, 4:2:0 is probably fine. But if you’re actually trying to do professional compositing—like placing someone in a complex environment or adding motion blur—that extra money for 4:2:2 is non-negotiable. Without that extra color data, your edges are going to look jagged and “crunchy” the moment you try to key them. Don’t cheap out on the data if you want a clean edge.
How much does my lighting setup actually affect the way subsampling messes with my edges?
Look, here’s the reality: subsampling is a math problem, but your lighting is what makes that math fail. If your lighting is uneven or your green screen has hot spots, you’re creating massive color gradients. When the hardware tries to “average out” those color chunks via subsampling, it can’t find a clean edge anymore. It just guesses, and you end up with those nasty, jittery artifacts around your subject. Smooth, even light is your best defense.